Welcome! I'm Melanie & I sell fabric through my online shop, Modern Organic Fabrics. This journal shares my inspiration and projects, both sewing & non-sewing, as well as shop updates.  

Search
New Fabric!

My Happy Nursery


Herbal-Dyed Fabric


Coming Soon!


Expected: December :: Beach Mod by Monaluna

Expected: October :: Handloom Shirting


Expected: November :: Marine by Dan Stiles

Grab A Button!

Drag & drop the desired button to your desktop, then upload the button to your website and link it to:
http://www.modernorganicfabrics.com


120 X 120


125 X 125


150 X 150


160 X 160


Monday
Dec212009

Some Fabulous Uses For Modern Organic Fabrics

I love seeing what people make with fabrics from the shop. Take a look at some of the fabulous things made by some wonderful Etsy sellers:

Organic Nap Mat by Sewn Natural, using Pink Polka Dot organic cotton fabric from Westfalenstoffe.


Organic Alphabet Pacy Shirt by SF Clothing, using Alphabet Soup organic cotton interlock fabric by Harmony Art.


 Certified Organic Cotton Sleep Mask in Pure Black by Doodlebug's Fun Fabrics, using organic black cotton jersey.

Thursday
Dec172009

Quick & Thrifty: Last Minute Christmas Cards


I usually send cards with pictures of the kids to friends and family, but I like to give teachers handmade cards that the children either make themselves or help with. I find that oftentimes my kids get bored with making cards before they are finished, so this year we are doing something quick and easy for all of us.

I've been saving security envelopes for months (maybe years) wanting to make a cool project with them as I've seen all over the web. I've seen so many projects made with them that I can't be 100% sure that my project is unique, so if you've seen it somewhere else please let me know so I can add a link.

Supplies:

::Cardstock (I used pre-cut A6 Flat Cards, 4 1/2 X 6 1/4), you could also cut some with fancy scrapbook scissors
::Security envelopes
::Foam mounting tape
::Scissors
::Markers, pens or colored pencils

1. Cut security envelpes into perfect squares. Fold several times and have child make snowflakes

2. Write Christmas message on one side of card & have child sign name

3. Cut mounting tape into 4 small pieces (per snowflake) and attach to back center of snowflake

4. Attach snowflake to card

5. (optional) Punch holes in top of card & attach ribbon for hanging. Then there is no need for an envelope, just attach ribbon to gift.

In my case, the children make the snowflakes and sign their names - easy and fun for them. I do the rest - quick and easy for me. This project could easily be upgraded into a fancier looking card with the addition of some layers of colorful paper or more (smaller) snowflakes.


Saturday
Dec122009

Winter Candy Forest Cake

My big girl turned 9. This year I didn't ask her what type of cake I should make. In years past we've had Nemo, Dora, Harry Potter, polka dots, etc. I'm not an expert cake decorator, but I like to have fun. I've messed things up and had to improvise many times (with the Nemo cake, I ran out to the grocery store at midnight and bought a pre-made cake from the cooler, used blue cake "spray paint" and toys for decorations). I decided to go low stress + big impact this time and made a Winter Candy Forest cake, based loosely on this one from Martha Stewart. I made the chocolate cake and chocolate frosting for in between the layers using recipes from the Angry Chicken's cheat sheet (my very favorite chocolate cake recipe ever period). Since I've made this recipe before it was quite easy for me. I messed up the ganache because I didn't use fancy, expensive chocolate as recommended by Martha (I used, um, chocolate chips. Lesson learned). But the snowy meringue surpassed my expectations. So easy and satisfying to make and use, the recipe came with this can of Wilton Meringue Powder (found with the bakery supplies at Michaels). I decided to do a Candy Forest because I knew the impact of the colorful candy would be big and the setting up of the scene would be forgiving.

She loved the cake. And it tasted great. I'd call it a success!

PS - See the story of winter figurines here.

Tuesday
Dec082009

Staying In

I kind of like snowstorms. Even if I had somewhere to go, I don't anymore. Okay, I don't like the shoveling too much and I get nervous that the electricity might go out (because that would mean no heat for us). But most of the time the lights stay on and some neighborhood kids stop by with shovels. Maybe I'll bake some cookies ... do some sewing ... send the kids outside bundled up in snowsuits ... make some hot chocolate ...

Friday
Dec042009

Easy Ruffle Trim Scarf Tutorial

For last minute handmade gifts!! A fairly easy scarf with ruffle trim. The only reason I say "fairly" is because the ruffle requires a small amount of gathering, which isn't hard but is sometimes frustrating. However, there are only two small ruffles, so the gathering isn't very time-consuming. This scarf is made on one side with organic cotton gingham fabric and the other side soft, medium-heavy weight organic cotton flannel. It is super-soft and incredibly warm!

The dimensions of this scarf are such that you can make 4 scarves from exactly 2 1/2 yards of 44" wide fabric with no waste. Hmmmm, multiple Christmas gifts? See diagram below!


You will need:

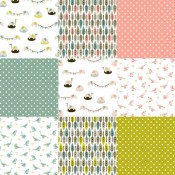
:: For 4 scarves: 2 1/2 yards 44" wide cotton fabric (I used yarn-dyed organic gingham - advantage: no wrong side!) For one scarf: 1 3/4 yards of 44" fabric (you will have extra fabric) or 1/2 yard of 60" fabric
:: 1 1/2 yards med-heavy weight 59" flannel (I used un-dyed organic cotton)
:: Thread, needle, sewing machine, scissors, etc


Step One:

Cut gingham fabric according to diagram above. (Note: the cutting diagram is assuming you plan to make 4 scarves, cut accordingly if you plan to make one)

Step Two:

Cut flannel fabric into 4 pieces, 11" x 59" each. (Assuming you are making 4 scarves, cut accordingly if you plan to make one)


Step Three:

Fold each ruffle piece (22" x 7.5" pieces) in half legthwise, right sides together, and press. Sew along each short side with a 3/8" seam allowance. Turn right side out. You will have 2 ruffle pieces for each scarf you make.


Step Four:

Sew gathering stitches along one long side of the ruffle piece (the non-folded side). Gather to 11". Repeat with other ruffle(s).

Find great instructions on gathering here: The Handmade Dress: Little Gathering Tutorial (video) or here: Tinylicious: Tiny Tutorial: Easy Gathering (photos & instruction)


Step Five:

Lay scarf piece right side up and place one ruffle on each short end. Align raw edge of ruffles with edge of scarf. Pin and sew using a 3/8" seam allowance, keeping gathering stitches inside the seam allowance.


Hint: use your seam ripper to help guide gathered material through the sewing machine.

Repeat with other side(s).


Step Six:

Pin ruffles to side as shown above to prevent them from getting caught up in the seams. Lay flannel scarf piece on gingham scarf, right sides together. Pin.  Sew around scarf using a 3/8" seam allowance, checking and double checking that the ruffles are not getting caught up in the seams when sewing near the ends. Leave a 6" gap on one long side. When sewing the short ends, place the stitches from the ruffle inside the seam allowance, even if it means creating a bigger seam allowance, for a clean and professional look.


Step Seven:

Turn scarf right side out. Hand stitch the gap closed. Admire your work and keep warm :)

PS - You can find a kit with the exact amount of fabric that you need for 4 scarves in the shop!