
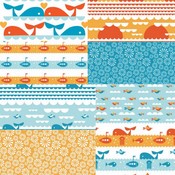
First of all, I need to let you know that I altered the pattern a bit, so it's not a true depiction of the pattern in the magazine. I decided to go with a t-shirt (actually a boy's pattern) because I had this cute ladybug fabric that I thought would make the perfect t-shirt. I'm not interested in ironing my 4-year-old's clothing, so I love the idea of using knits. Pattern is from Ottobre Design Spring 2010, #22 "Stripey & Robot" T-shirt.

This is the first Ottobre Design pattern that I've ever made and it was way easier than it would appear to be. You see, the patterns look quite intimidating but it's not that hard to decipher your pattern pieces. Also, this is a very eco-friendly (and cost-saving) way of printing patterns. You trace what you need onto tracing paper (I used this) and no waste. Ottobre Design magazines are fabulous for the amount of patterns and designs included in each one. I'm a huge fan :)

I'll start with the shirt I made, then explain how to use the Ottobre Design patterns.
Challenging:
- Tracing the pattern. There is a learning curve involved, once you know how to do it each successive pattern will be easier.
- Adding seam allowances. Easier this time (my second time adding seam allowances) but not as easy as having them already added.
- The instructions expect that you already know how to put together a basic garment. For example: "Stitch shoulder seams. Stitch sleeves to armholes." Those are the instructions, so these patterns aren't really for beginners. But after you've stitched shoulder seams and sleeves at least once you probably know how to do it and don't need detailed instructions anyway.
- I had trouble with the collar. I stretched it too much when adding the ribbing, though it seems to bounce back after steaming with an iron or washing/drying. I suspect it may be a problem with the fabric which is really stretchy.
- My top stitching isn't the straightest and I used black for contrast. However, I'm satisfied with it because the wearing of the garment sort of pulls it anyway and makes it less obvious. The pattern didn't call for that much top stitching, I added it for interest.

Easy:
- Sewing with knits. Everything always lines up.
- I used the bottom hem of a 100% cotton ribbed tank top (women's small) for the collar so I didn't really follow the instructions for folding over and adding the ribbed collar. I was prepared to use the same ribbed material for the cuffs when we decided to make the t-shirt with short sleeves instead.
- Fast. The shirt came together really fast.
- I don't have a serger, so I just turn up the hems and top stitch.
How to use an Ottobre Design pattern:
Always read the general instruction page first, for it explains a lot of the how-tos.

After you choose your pattern, look for the sheet number and color in the little box under the list of pattern pieces.
After finding your sheet (in this case "D"), look for your first pattern piece ("1") in the color indicated (in this case "red")

The numbers are listed along the bottom of the sheet as a guide. When you find your number/color combination (in this case "1" in "red"), trace your finger up to find the pattern piece. Much like reading a road atlas (does anyone do that anymore?)

Place your tracing paper (I used Kwik Trace) over the pattern. I taped down the pattern sheet and tracing paper with low tack masking tape to prevent slipping and used a ruler for straight lines. It was really much easier than you would imagine to follow the correct lines. Finding the all the pattern markings is a bit more of a challenge. Don't forget to write the pattern numbers on the traced pieces.
Ottobre Design patterns do not include seam allowances but do include hem allowances. I added seam allowances using tailor's chalk directly to the fabric after putting the traced pattern pieces on the fabric.
Also, just a personal preference, when cutting knits I prefer to use pattern weights (you can use anything heavy enough to keep the pattern from floating around) rather than pins to keep the fabric from shifting out of shape. I also prefer to use a rotary cutter rather than scissors for the same reason.
Overall, I'm pleased with my first attempt at a t-shirt. Some may wonder why I would choose to make a t-shirt when really you can buy them so cheaply. Well, it's a part of my plan to make more clothing for my children and to make things they really want to wear. I consider myself an intermediate-level sewist and I'm starting with projects that are easy to put together and easy for them to wear.


 Share Article


