Project Imrov - 2nd block (or 1st?)
 Saturday, January 31, 2009 at 12:31AM
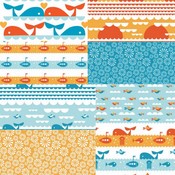
 I completed another block for my Project Imrov quilt. I decided to challenge myself by using all patterns and no white. I also added yellow to the color palette because this fabric was screaming to me from my stash that it belonged with these reds and blues. I am very pleased with the result! Now I'm wondering if it will work with the first block... It could, I have to think about which direction the quilt will take and if it will follow one block or the other or will incorporate both.
Valentine's Cards for Classmates
 Sunday, January 18, 2009 at 12:19AM
 This year I came up with a new idea for the annual Valentine's Day card exchanges for my girls' classmates. In years past we have bought Valentine's cards, but it always seems so impersonal. We've also made cards (with glue, doilies, colorful paper, etc), but my daughter is usually bored and/or frustrated by the third card and I end making all the cards. This year I had my 8-year-old draw out her designs with marker and artist crayons on 5.5" X 8" paper (a regular piece of paper, cut in half). For my 3-year-old, I drew hearts on the paper and had her color them. I scanned the artwork into the computer as JPEG files, cleaned up and added text (if needed) in Gimp and imported them into OpenOffice. I then resized them to fit 12 on a page (really easy, you just grab the "handles" and move to the correct size). I made them each approximately 2.5" X 3.5". I am printing them on card stock and cutting them apart with a box cutter. The girls will write names on the back. Handmade artwork without the "production line" frustration! (and of course, I had to get in on the act as well, I used stencils for the lettering on my "crossword" Valentine!)
 Crafting,
  Creations of Children,
  Inspiration
 Project Improv - First Block
 Friday, January 9, 2009 at 11:20PM
 I've joined Tallgrass Prairie Studio's Project Improv group (you can read about it here). I actually had the time to work on my first block today! This will be my first "real" quilt. I'm working on some doll quilts for the girls, using them to practice quilting, etc. But this will be the first larger quilt I make (I haven't decided a size yet, but will probably do a lap quilt size so I don't get overwhelmed!) I'm very excited to do an improvisational quilt as my first because I've always been worried about the frustration in not lining up seams correctly or cutting accurately. Also, I prefer guidelines over rules so this will be perfect for me!
I decided to use Tallgrass Prairie Studio's Wonky Log Cabin block tutorial to design my block. I'm using only fabric from my "stash", which is mostly vintage and thrifted. (Except for the charity block, I'm looking forward to buying some fabulous fabric for that!) I first sifted through it to find a color combination I wanted to work with. Oddly enough, I ended up with red and blue (odd because I never use those colors in anything - decorating, clothing, gardening...) but the colors felt right. Since this quilt is 100% improvisational I felt it was important to pick fabrics based on emotion rather than logic (logic would say, pick colors that match your home, right?)
I was surprised to learn that most of the time involved in making this block was in picking the right fabric for the right spot. I challenged myself to make the block look modern and fresh even though I was using vintage fabrics. I cut a lot more strips than I used because I kept changing my mind! I made some mistakes in the piecing, but since this block is improvisational and I like the final look, that means they're not actually mistakes, right? Anyway, I couldn't be more pleased with the final block! I took the picture after dark, so maybe I'll post another one tomorrow if the sun comes out! EDITOR'S NOTE: Still no sun, but I took (somewhat) better pictures on a bright, snowy day. If the sun ever shines on Wisconsin again, I'll get some better pix!
 Quilting
 Beautiful Gifts
 Thursday, January 8, 2009 at 12:58PM
 I'm very late on posting this (I'll blame it on The Fabric Shopper!) Here are some gifts received (and given) for Christmas!
Handmade (or homemade?) calendars given by us to family. I took pictures the girls had made throughout the year, scanned them into the computer to clean them up (and color them, in some instances) and put them into a calendar template I made. (I have a Mac and used all freeware applications from the web - Gimp (is like Photoshop) for the pictures and OpenOffice (like MicroSoft Office) for the calendars. I printed them on cardstock (2 to a page), cut them with a box cutter, cut the corners with a nifty corner cutter found in the scrapbooking section of JoAnn's (bought with a nice 50% off coupon!), punched holes in the corners and added a keyring.
Beautiful Gifts Received:
A hand-knited washcloth.
Handmade ABC books using family (and blog!) photos.
A lovely, non-plastic, reusuable water bottle.
Orange (!) measuring bowls.
Memory game.
Charley Harper flashcards/floor puzzle.
 Inspiration
